The Curtain I Dyed to Match My Pink Bathroom
Ever since I shared the story of my pink bathroom, the one color I thought I’d hate but slowly fell in love with, many readers have asked how I decorate a space with such a specific shade. The truth is, the bathroom has felt almost complete for months, except for one missing piece: a curtain…
Ever since I shared the story of my pink bathroom, the one color I thought I’d hate but slowly fell in love with, many readers have asked how I decorate a space with such a specific shade. The truth is, the bathroom has felt almost complete for months, except for one missing piece: a curtain for the bath area.
I had been using a temporary liner, telling myself I’d eventually buy something that matched, yet everything I brought home looked either too harsh or too soft, too white or too patterned, too modern or too vintage.
Then one morning, after answering a message from a reader who said, “Your pink bathroom makes me want to try color again,” I realized I needed the curtain to feel intentional, not accidental. That was the moment I decided to dye a curtain myself.
Choosing the Curtain and Materials (All From Things I Already Had)
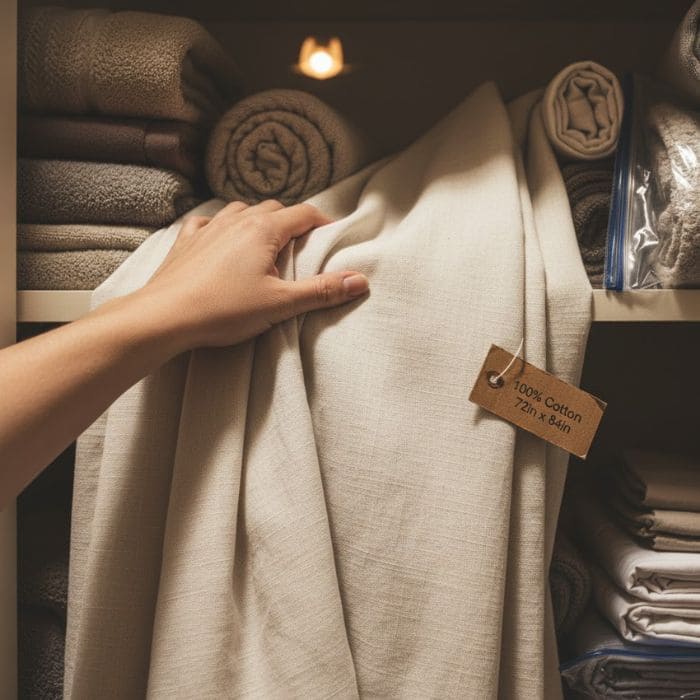
I went through the linen closet and found a plain 100% cotton curtain panel from our old guest room.
It measured 72 by 84 inches, long enough to cover the bath without overwhelming the small space. Cotton is one of the best fabrics for dyeing because it absorbs color evenly, so it felt like a sign to finally begin.
For materials, here is exactly what I used:
- A single off-white cotton curtain panel, 72″ × 84″
- Rit Dye Powder in Rose Pink (I had a half box left from another project)
- A tiny pinch of Rit Dye in Coral to warm the color
- A 5-gallon plastic bucket from our garage
- Rubber gloves
- Table salt (2 tablespoons – helps bond dye to natural fibers)
- Mild detergent
- Stainless-steel mixing spoon
- Plastic sheet to protect the bathroom floor
- A tension rod we already installed last year and never used
I didn’t buy anything new. Everything came from drawers, shelves, or leftover craft boxes.
Preparing the Curtain Before Dyeing
I washed the curtain first, using Tide Free & Gentle on a quick cycle to remove any fabric softener residue or dust from storage. This step is important because clean fibers accept dye more evenly.
Instead of putting it in the dryer, I hung it outside under the patio where the Florida breeze helped shake out the wrinkles while keeping the fabric slightly damp. The whole pre-wash and drying process took about an hour and a half.
Mixing the Perfect Pink Dye
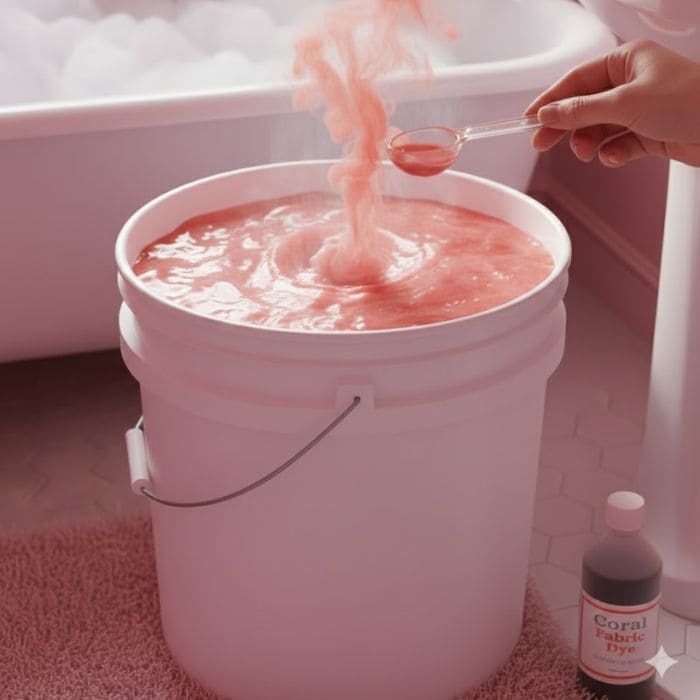
Dyeing is always a little bit of science and a little bit of instinct. I filled the bucket with three gallons of hot tap water – hot is crucial for the dye to activate and poured in the remaining half packet of Rit Rose Pink.
The color was pretty, but I wanted something warmer to match the existing wall color, so I added just one teaspoon of Coral dye.
To help the dye adhere to the cotton fibers, I stirred in two tablespoons of table salt, which is something many first-time dyers forget.
I dipped a small fabric scrap for 30 seconds to test the shade. Once rinsed, it looked too pale. So I added another teaspoon of Rose Pink, stirred again, and tested once more. This second batch felt right.
The Dyeing Process in Real Time
I rolled the damp curtain loosely and lowered it slowly into the bucket, letting it unfold inside the water. Using the stainless-steel spoon, I moved it continuously so no section settled in one place too long, this prevents uneven patches or streaks.
For the first 10 minutes, I stirred almost nonstop. After that, I returned every five minutes to shift the fabric. Total dyeing time: 35 minutes
Every time I lifted a portion of the curtain to check, the color deepened in the way warm tea does when steeping – slowly, then all at once. The bathroom smelled faintly of hot cotton and dye, a strangely cozy scent that reminded me of the tie-dye projects I did in high school.
Rinsing, Setting the Color, and Preventing Fading
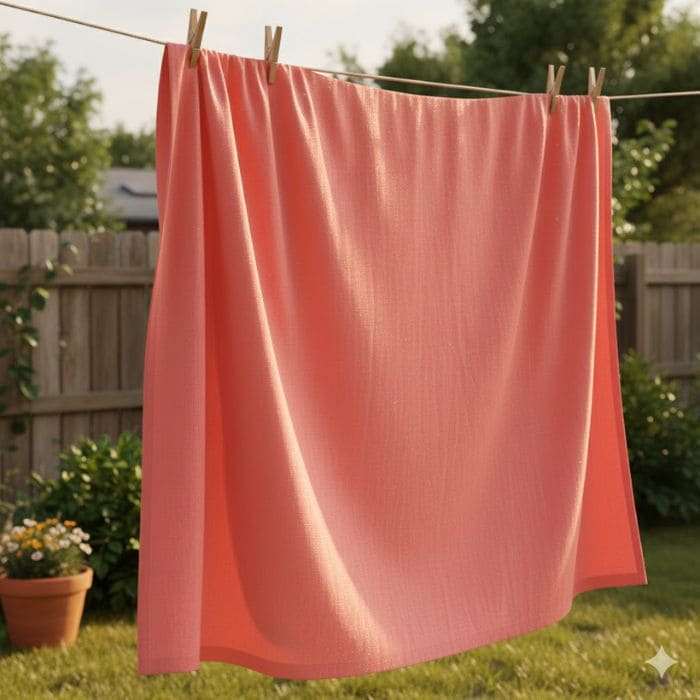
Once the shade was perfect, I carried the bucket outside and began rinsing the curtain with the hose. The trick here is patience: rinse until the water runs nearly clear, then rinse again for good measure.
To help set the dye and prevent fading later, I soaked the curtain for 10 minutes in a mixture of cool water and ½ cup white vinegar. This old trick came from my mother, and I still use it every time I dye anything.
Then I hung the curtain over the patio railing to dry. In the sunlight, the pink shifted beautifully — soft but confident, subtle but unmistakably intentional.
Installing the New Curtain
Once dry, I brought the curtain inside and gave it a light steam with my handheld steamer to remove minor wrinkles.
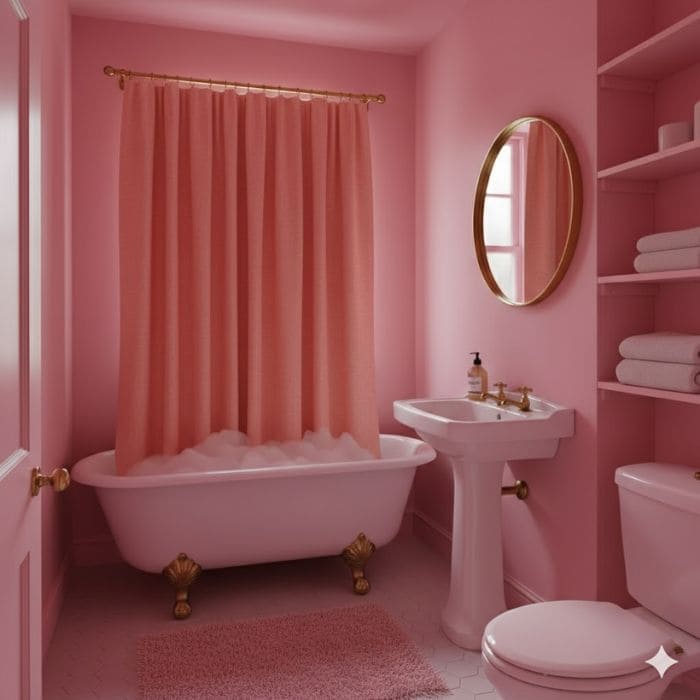
The tension rod above the bath had been waiting empty for months, so installation didn’t require anything complicated, simply sliding the panel on and adjusting the folds so it draped evenly.
The moment the curtain settled into place, the entire room changed. The pink wasn’t an exact match to the walls, which made it even better, it looked layered, thoughtful, and softly tonal, the way older homes layer colors naturally over time.
Daniel passed by and said, “It finally looks finished,” and he was right. That little curtain completed the room in a way I had been hoping for.
How the Curtain Holds Up And What I Learned
I’ve been asked before whether dyed curtains fade quickly. Here’s what I’m doing to protect mine:
- Color-Protection Tips I Use
- Wash only in cold water
- Add 1 tablespoon of salt to every wash for natural color setting
- Use gentle detergent
- Avoid strong sun exposure when drying, indirect light is best
- Steam instead of iron to prevent heat damage
Because the curtain is in the bathroom, where humidity rises often, I also mist it lightly with a fabric refresher weekly and leave the window cracked to prevent moisture buildup.